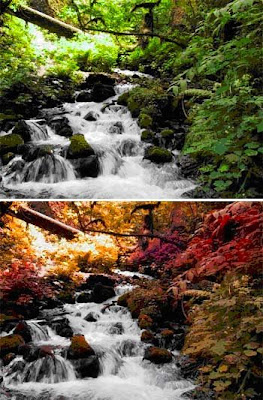
Can’t wait for the unique colors of autumn? This tutorial will show you how to change the colors of summer into autumn in seven simple steps.
Step 1.
Open up your file: file>open or ctrl +O Step 2.
Go to image>adjustments>hue&saturation or ctrl +U and change the value of hue to -25 Step 3.
Choose Lasso tool, and enter 35px in the feather box. Step 4.
Click and drag on a bunch of leaves at the top right hand side. Step 5
Click on add to selection icon Step 6
Now, select some more leaves at the left hand side Step 7
Go to image>adjustments>hue&saturation or ctrl +U and change the value of Hue to -65 and saturation to +15 That’s It! Just play around with the selection and image hue and saturation, then you will get the most beautiful autumn colors you can dream of..
Autumn Colors with Photoshop
Adding butterfly wings to your picture
In this tutorial I'll show you how by adding butterfly wings and a few other minor edits to this womans photo we are able to create a stunning picture that she can use for profiles and avatars at websites or even print out and use for a birthday card or something like that. 1: To begin you simply open the photos that you are going to be working with.
 2: Then click on "File" and click "New"
3: Then you will need to erase the woman’s background ( you can do it with any Lasso Tool or with Magic Eraser Tool) Then click on "Select" then "All" and then "Copy" 4: Next click on the new document – Paste – Edit – Free Transform to fit the wings into place.
 5: Next open the butterfly image and after erasing the background with Magic eraser Tool go to - Select – All – Edit – Copy
 6: Then highlight the layer1 – Paste
 7: Move the butterfly layer2 under the layer1- Edit- Free transform to fit it how you would like.
 8: Its now time to merge layer 1 and layer 2 together.
9: Now to add some finishing touches go to Image - Adjustments – levels and mess with the adjustments until you get it the way you like. 10: Now to add a reflection to the bottom you will need to make a Copy of layer2 – then place layer 2 copy under the layer2 and Use Free transform again to size it into place. Finaly just adjust the opacity down to about 20% to get the reflection just right.
 11: Your finished image should now look like this:
